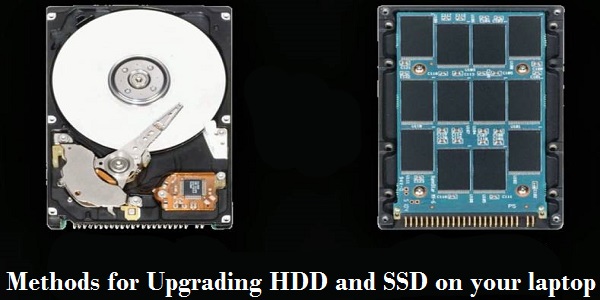
Methods for Upgrading HDD and SSD on your laptop
Your laptops require updates on their operating system, external DVD drive, and other components regularly. A DVD drive is responsible for processing the reading and writing data between the optical disks. In the past few years, the latest technology has been removing DVD drives from notebook computers. But people who continue with their older laptops are still using a DVD drive that requires timely updates to function smoothly.

Nowadays, people are gravitating towards Hard Disk Drive and Solid State Drive, and the combination of both the drives extend the storage capacity. If you are also looking for a way to swap or replace the DVD drive with an SSD or HDD, then you will have to get a few components, such as a drive caddy (before buying this, make sure that you remove your optical drive and measure the thickness), Plastic Level tool and a screwdriver
Preparing your gears beforehand will help you manage everything easily. If you are a fresher in these tasks, then follow our complete guide below to swap the drive without any fuss. We have divided the procedure into five steps, and this is where you start:
Order a Drive Caddy
HDD caddy is a special case for HDD or SSD built from aluminum. The case has a plastic frame, from where you can connect the hard drive inside your laptop. This will act as extended storage for your device. Because the RAM, Hard Disk Drive, and DVD drive use common connecter from device-to-device, it becomes easier to replace them. You can purchase a good caddy on eBay or Amazon for less than $15. Additionally, caddies are equipped with SATA connectors, so if you slot them in, the replacement drive will begin to act as additional storage for your device.
Choose an HDD/SSD
Your next step should be to choose an SSD or HDD to replace it with the optical drive. Please check that the storage of the drive meets your requirements. But, we would recommend you to use a larger capacity drive than your current requirement as you might require it in the future and it will hold all your data safely for the most extended period.
Remove the existing DVD Drive
After getting your base ready for the whole procedure, it’s time to remove the DVD drive. The removal procedures are usually easy, but the older companies used a different algorithm which might give you a hard time removing the DVD drive. But the most common method uses these steps:
- Place a towel on your table and keep your laptop on it.
- Your laptop should be upside down with its head facing down the towel.
- At the center of the laptop, you will find the DVD locking screw. Remove that screw from the slot.
- Pull the optical drive or push the removal button, depending on the model of your laptop.
Use of screwdriver to remove the DVD drive fascia from the laptop. Please keep all the parts safe as you might require them later.
Place the HDD/SSD into the Caddy
This is the most effortless procedure of all. The drive caddy that you had purchased earlier might come with a screwdriver. If not, then use your own screwdriver to tighten and secure the HDD or SSD inside the caddy. Ensure that it is used through all the parts tightly; otherwise, the caddy will not slide back on your laptop.
Insert the Caddy
Begin with the fascia you had removed earlier. Attach the fascia back by pushing the catches on to the right slot. Make sure that you don’t break the catch. But, if you have already messed up, then you may use a hot glue gun carefully to attach the parts. Then insert the drive and secure everything with screws to keep all the pieces intact.
With this, you are now ready to use your device with new storage. Use it with the latest operating system on your laptop for a better experience. This extra investment for your laptop will prove beneficial to you.
I’m Bond walker . I’m a web developer living in New york. I am a fan of technology, a publisher of guides at Business Directory design, and programming. You can read my blog with a click on the button above.

Comments
Post a Comment